If you’re serious about improving at cricket, waiting for your next academy session isn’t going to cut it. The players who actually get better are the ones putting in work between sessions — at home, in their garden, on their terrace, in their garage. Virat Kohli is famously obsessive about his batting routine even on rest days. Jasprit Bumrah rebuilt his unusual bowling action largely through repetition in his backyard as a teenager in Ahmedabad.
You don’t need a full 22-yard pitch. You don’t need a bowling machine. And you don’t need a partner standing at the other end. What you do need is a plan — the right setup for your space, a smart equipment kit for your budget, and drills that actually work when you’re training alone.
I remember my bowling and catching practises on walls of my house. the available equipment and space were limited on those days as compared to current scenario. In my opinion this Home cricket training guide can definitely improve the playing standards of once who attempt this.
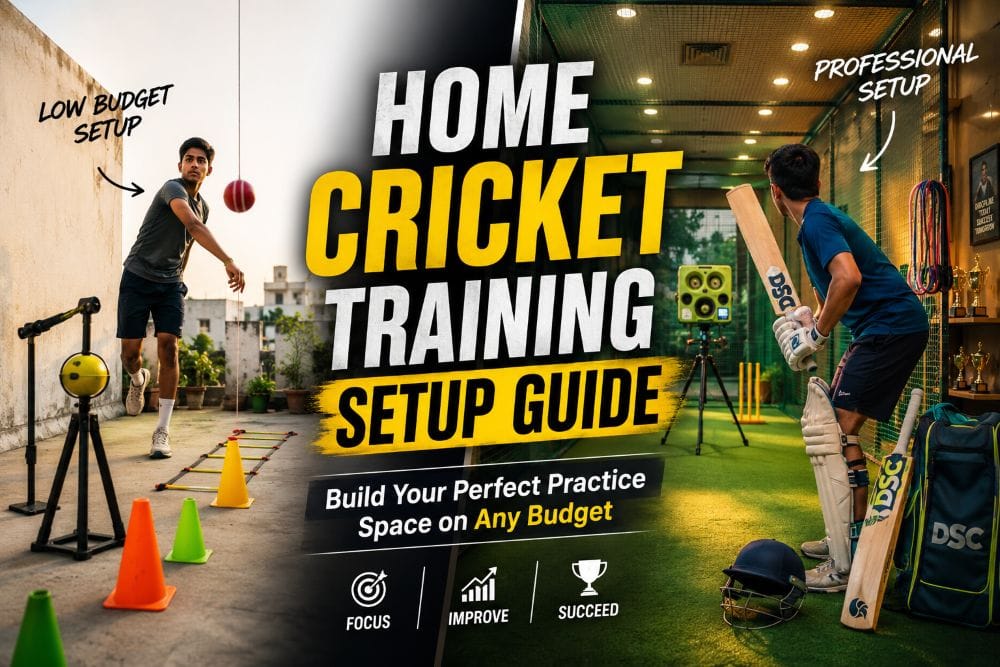
This home cricket training setup guide covers exactly that — the right space, the right gear, and the right drills for where you are right now. And if you’re looking to understand the full physical demands of pace bowling, don’t miss our Ultimate Guide to Fast Bowling in Cricket (Beginner to Pro) — which pairs perfectly with this home cricket training setup guide. And do not forget to take your reflex speed test at the end of the article.
Why Home Cricket Training Is the Fastest Way to Level Up
Most cricketers train once or twice a week at a club or academy. That’s around 2–4 hours of structured practice. If you add just 30 minutes of focused cricket practice at home on four other days, you’ve nearly doubled your total training volume without touching your schedule.
The math matters. Batting is a skill built on muscle memory. The more times your body repeats the correct movement — front foot drive, pull shot trigger, grip position — the more automatic it becomes under match pressure. One solid 30-minute home session beats a distracted 90-minute net session where you’re waiting in a queue and chatting between balls.
There’s also the mental game. Home training lets you go slow. You can pause, reset, fix a habit, and repeat it twenty times in a row without anyone watching or judging. That’s the kind of deliberate practice that actually rewires technique.
The other advantage? Specificity. At a net session, you work on what the coach sets up. At home, you work on your weakness. If you’re struggling against short-pitched bowling, you can design your entire session around it. If your off-side game is leaking runs, you can spend forty minutes just on that.
My personal opinion on this is, home cricket training makes you fit and build your techniques faster when others rest and places you at higher positions than your competitors.
How to Assess Your Space and Match It to the Right Training
This is the part nobody talks about. Most home cricket training guides assume you have a garden. The reality is that most cricketers in India are working with a terrace, a flat corridor, or a small backyard. The good news: almost every space is trainable once you know what to do with it.
Under 50 sq ft — Bedroom, Balcony, or Small Terrace
This is enough for serious skill work. You’re not hitting full drives, but you’re doing the stuff that actually improves batting the most: grip, stance, backlift, and trigger movement.
What you can train.
– Shadow batting — full shot sequences in the mirror or against a wall
– Stance and guard drill — set a crease mark with tape, practise walking in and taking guard
– Wrist and finger spin grip work — hold a ball and practise seam position, wrist release, loop
– Fitness: skipping, planks, lateral lunges, squats — all cricket-specific conditioning
A mirror is genuinely one of the most useful training tools you can use in a small space. Set it up facing you and shadow bat for 10 minutes a day. You’ll start seeing things your coach has been trying to tell you for months. I would suggest, you read more about shadow batting sessions in the further sections in this article.
50–150 sq ft — Garage, Rooftop, or Medium Terrace
Now you have room to move and react. This is where the real batting and bowling mechanics work starts in the home cricket training.
What you can train.
– Hanging ball drill — suspend a ball from a rope or elastic at stump height; work on contact point, head position, and swing path
– Wall-rebound catching — throw a ball against a solid wall and catch the return; vary angle and force
– Bowling run-up grooves — mark your full run-up with tape, run through it repeatedly without releasing, focusing on gather, jump, and action
– Short-pitch target bowling — set a target zone on a mat and bowl at it for accuracy
One important note: if you’re bowling on concrete, use a rubber mat or a yoga mat at minimum. Bowling barefoot or in thin soles on hard surfaces is a reliable route to shin splints and ankle problems. Cricket bowling mechanics put unusual stress on the front leg — protect it.
150–400 sq ft — Garden, Courtyard, or Open Rooftop
This is where a proper home cricket training setup becomes possible. With this space, you can run a functional home cricket net setup that replicates a reasonable net session.
What you can train.
– Full batting net with a return net or side netting
– Throwdown practice — if you have a partner or a throwdown stand
– Slip catching with a slip cradle
– Full bowling run-up and delivery into a target or net
– Fielding drills: ground fielding, catching, and throwing accuracy at stumps
For outdoor spaces, you need to think about surface and safety. A portable artificial pitch mat is the single best upgrade you can make to a garden or rooftop setup — it gives consistent bounce, protects the surface underneath, and makes training feel real.
| Space Size | Training Type | Key Equipment |
| Under 50 sq ft | Technique, fitness, grip work | Mirror, skipping rope, ball |
| 50–150 sq ft | Mechanics, reflexes, bowling grooves | Hanging ball, wall, mat, stumps |
| 150–400 sq ft | Full batting, bowling, fielding | Net, pitch mat, cradle, cones |
Cricket Equipment for Home: Three Budget Tiers That Actually Make Sense
Every guide online gives you the same list: bat, ball, pads, helmet, gloves. That’s not a home cricket training equipment list — that’s a what-to-wear-on-match-day list. Home training equipment is different, and it doesn’t have to be expensive.
Starter Kit — ₹500 to ₹2,000
You’d be surprised how much you can do with very little. This tier covers the basics for indoor cricket drills in small spaces and outdoor technique work.
Tennis ball or soft training ball (₹50–₹150): For indoor work and solo catching drills
Rubber stump set (₹300–₹600): Lightweight, safe, gives you a real target to bowl at
Skipping rope (₹150–₹300): Ten minutes of skipping is better cricket conditioning than twenty minutes of jogging
A wall: Free, and the best catching and fielding partner you’ll ever have
Chalk or floor tape (₹50): Mark your crease, your run-up, your bowling target zones
At this budget, your sessions focus on shadow batting, fitness, grip work, and solo wall catching. That alone, done consistently, will improve your game.
Intermediate Kit — ₹2,000 to ₹10,000
This is the sweet spot. Most serious club-level home setups live here.
Hanging ball / cricket throw-trainer (₹800–₹2,500): One of the best home batting tools available. Gives you instant feedback on timing and swing path without needing a bowler
Practice bat or old match bat (₹500–₹1,500): Use a spare bat for heavy drilling to protect your main bat
Basic return net or rebound net (₹1,500–₹4,000): Turns a 10-minute drill into a 30-minute session by eliminating ball retrieval
Resistance bands (₹400–₹800): For shoulder strength, bowling action work, and fielding dive fitness
Agility cones (₹300–₹600): Footwork patterns, catching approach lines, fielding circuits
Reaction ball (₹200–₹400): An uneven-bouncing ball that trains reflexes for close catching and wicketkeeping
Serious Setup — ₹10,000 and Above
This is for the dedicated club or district-level player who wants a home setup that seriously bridges the gap between sessions. As you can see cost is on higher side, this is not highly recommended for home cricket training.
Portable cricket net (₹4,000–₹15,000): Options range from basic three-sided nets to full batting cage setups. Look for UV-resistant netting if it’s going outdoors
Artificial pitch mat (₹3,000–₹12,000): The foundation of a real backyard cricket setup. Gives consistent bounce and seam movement
Slip catching cradle (₹2,500–₹6,000): Valuable for both batters (to practise playing close to the body) and fielders
Entry-level bowling machine (₹8,000–₹25,000): The Leverage or Bola Junior level machines are genuinely game-changing for solo batting practice at home
Stump set with bail lights (₹2,000–₹5,000): For match simulation and accuracy drills
Where to buy: Amazon India, Decathlon, Sports Station, and local sports shops in most tier-1 and tier-2 cities stock the essentials. For nets and pitch mats, look at dedicated cricket retailers or contact your district cricket association — they often have supplier contacts.
Solo Cricket Drills That Work Without a Bowling Partner
This is the most valuable section in this home cricket training guide, and the one most articles completely skip. Whether you’re looking for cricket training drills for beginners or trying to tighten up club-level technique, all of these work without a partner. Cricket training without a coach or partner is not just possible — it’s often more effective for fixing specific technical problems, because there’s no time pressure, no queue, and no ego.
Here’s a breakdown by discipline.
Solo Batting Drills
Shadow batting sequences (10–15 minutes)
Set up in front of a mirror or film yourself from the side. Call out shot types to yourself — “front foot drive,” “pull,” “cut” — and play each one as if the ball is there. The goal is not speed; it’s precision. Hold your follow-through for two seconds after each shot. You’ll immediately feel where your balance breaks down. in this drill you use only articles available in every household. Therefore, I would say this is a low cost-high tech training technique in home cricket training.
A good sequence for a 10-minute shadow batting session – Home Cricket Training
20 front foot drives
20 back foot punches
20 pull shots
20 defensive blocks
10 cover drives
Rest
Repeat if you want a second set
Hanging ball drill (10–20 minutes)
Hang a ball from a rope, elastic cord, or bungee attached to a hook or overhang. Set it at stump height. The drill: stand in your stance, let the ball settle, then play it. Focus completely on your head position over the ball, your front elbow driving through, and your bat face at contact. Adjust height for different shot types. This is one of the best cricket batting practice at home tools because it gives immediate feedback — a mistimed shot goes offline, a good one goes straight.
Wall drive (5–10 minutes)
Stand 2–3 feet from a solid wall. Play forward defensive strokes, letting the ball rebound off the wall and playing again. Forces you to keep the ball down, keep your head still, and use soft hands. Twenty minutes of this improves defensive technique more than most net sessions.
Solo Bowling Drills
Cricket bowling practice at home is more structured than most people realise — you don’t need a partner, you need a target and a system. I remember practising fast bowling at the walls of my house during my childhood home cricket training.
Target bowling (15–20 minutes)
Place a coin or mark on a mat or pitch and bowl at it. Simple, old-fashioned, and devastatingly effective. The legendary fast bowler Dennis Lillee reportedly used chalk circles. Set a scoring system: full pitch on target = 1 point, good length on target = 2 points, yorker on target = 3 points. Play for 30 balls. Beat your score next session.
Run-up groove drill (10 minutes)
Mark your full run-up approach with tape or cones. Run through it repeatedly without releasing — just focusing on your rhythm, gather, coil, and delivery stride. No ball needed. This is how Bumrah and other bowlers with complex actions ingrain muscle memory. If your run-up is inconsistent, no amount of net practice will fix your no-ball problem — this drill will.
Seam and swing grip work (5–10 minutes)
Sit down with a ball and practise your seam position, wrist position, and release point slowly. Pick up the ball, set the grip, and go through the delivery motion at 20% pace. Glenn McGrath used to do this in hotel rooms during tours. It sounds boring. It works.
Solo Fielding and Catching Drills
Wall catching (10–15 minutes)
Here is the fun of home cricket training. Stand 3–4 metres from a solid wall and throw a ball against it, catching the return. Vary the angle to simulate slip catches, gully catches, and outfield returns. Use your non-dominant hand occasionally. Start soft and build intensity over the session.
One-hand solo catching (5–10 minutes)
Throw a ball upward at a slight angle with your right hand, let it bounce once, and catch with your left. Alternate. Sounds simple — after 50 reps your concentration will be fully engaged.
Agility and footwork patterns (10 minutes)
Set out 4 cones in a square, roughly 5m apart. Sprint to each corner, dive-slide at one corner, get up and sprint the next side. Repeat. Add a catch at a specific cone using a rebound net or wall. This replicates the explosive movement required in fielding without needing anyone to throw at you.
Wicketkeeper-Specific Drills
Wicketkeepers are the most under-served group in home training guides. Here’s what works:
Glove work against a wall (10 minutes)
Throw a ball against a wall and take catches in your gloves, focusing on soft hands (letting the catch come to you rather than grabbing at it) and keeping your fingers pointing downward for low catches. Start close and move back as confidence builds.
Footwork drill without a ball (10 minutes)
Set up stumps. Start in your keeper’s crouch. On a signal (a clap, or a metronome), step to your left to simulate a leg-side delivery, return to centre, then step right. Repeat for 30 reps. Then add gloves and a ball against the wall. This ingrained footwork pattern is what separates a clean keeper from a scrambler.
Reaction ball drill (5 minutes)
Drop a reaction ball from shoulder height and catch it in your gloves. The unpredictable bounce replicates the snick off the outside edge. Spend five minutes on this before every session — it sharpens reflexes faster than most wicketkeeping-specific drills.
Indoor vs Outdoor Cricket Training: Adapting Through Monsoon Season
Indoor cricket drills in small spaces don’t have to be a compromise — the right session plan turns a bedroom or terrace into a legitimate training environment. For Indian cricketers, the monsoon is the great disruptor. Four to five months of rain means outdoor sessions become unreliable, and most club schedules thin out. The players who keep improving through the monsoon are the ones who shift their training indoors rather than stopping. In my opinion, the importance of home cricket training is more highlighted in seasons like monsoon where the players have limited options for outdoor training.
What Works Indoors
The good news about indoor cricket drills in small spaces: the skills that benefit most from repetition — grip, stance, backlift, seam position, footwork — all work perfectly indoors. In fact, removing the ball from the equation sometimes helps, because you can slow everything down and focus purely on mechanics.
A rainy-day indoor session (45–60 minutes):
1. Skip for 8 minutes (warm-up)
2. Shadow batting in mirror — 15 minutes (full shot sequences, hold follow-through)
3. Resistance band shoulder work — 10 minutes (overhead pull, rotator cuff rotation)
4. Grip and seam position work with a ball — 10 minutes (sitting down, slow repetition)
5. Wrist spin release practice — 5 minutes
6. Stretching and cool-down — 5 minutes
This session fits in a bedroom. It addresses batting technique, bowling mechanics, and injury prevention simultaneously. It’s not a replacement for net practice — but done three times a week during monsoon, it keeps your body and mind match-ready.
Outdoor Training: Making the Most of Dry Months
When the weather allows, shift your setup outdoors and go harder. The dry season is when your technical work from indoors gets tested under real ball conditions.
Outdoor upgrades to prioritise:
– Set up your net before summer, not during — so you can start the season with it already running
– Cut the grass short (under 15mm) before rolling out a pitch mat; it gives better, more consistent bounce
– Bowl in the morning when the surface is slightly damp — you’ll get more seam movement and the training is more realistic
– Use a proper cricket ball outdoors, not a tennis ball; the feel and weight will change your technique feedback entirely
One tip most people miss: Keep a bucket of old, roughed-up cricket balls specifically for home training. New balls behave differently; match-worn balls give more realistic swing and seam. Ask your club captain to save the old match balls — they’ll usually say yes.
Weekly Home Cricket Training Schedule With Progress Benchmarks
A schedule without benchmarks is just a list of activities. Here’s a plan that tells you not just what to do, but how to know if it’s working.
The 5-Day Home Cricket Training Plan
Day 1 — Batting Technique (30 min beginner / 60 min serious)
– Warm-up: 5 min skipping
– Shadow batting sequences: 15/30 min
– Hanging ball drill: 10/20 min
– Cool-down stretch: 5/10 min
Day 2 — Bowling Mechanics (30 min / 60 min)
– Warm-up: shoulder rotations, wrist circles
– Run-up groove drill: 10/20 min
– Target bowling on mat: 15/30 min
– Seam and grip work: 5/10 min
Day 3 — Fitness and Conditioning (30 min / 45 min)
– Skipping: 10 min
– Lateral lunges, squats, planks: 10/15 min
– Agility cone drills: 10/15 min
– Resistance band shoulder work: 5/10 min
Day 4 — Fielding and Catching (25 min / 50 min)
– Wall catching: 10/20 min
– One-hand catch drill: 5/10 min
– Footwork agility circuit: 10/20 min
Day 5 — All-Round and Match Simulation (30 min / 60 min)
– Combined batting + bowling session
– Simulate match pressure: bowl 6-ball overs at a target, bat against hanging ball for timed sets
– Review any footage you’ve filmed during the week
Day 6–7 — Rest and Recovery
– Light stretching or yoga: 10–15 min
– Review your training log
– Watch match footage or technique videos (active rest, not couch rest)
Progress Benchmarks
These give you something concrete to chase:
| Milestone | What It Means |
| Week 2 | Hitting 7/10 balls on a wall-drive without mishit |
| Week 4 | Completing a 100-shot shadow batting sequence without breaking form |
| Week 6 | Bowling 6/10 deliveries in target zone during target bowling drill |
| Week 8 | Catching 15 consecutive wall rebounds without a drop (one hand) |
| Week 12 | Noticeable improvement visible in your own video footage comparison |
Keep a home cricket training log. It doesn’t need to be fancy — a notes app on your phone works perfectly. Date, what you trained, how many reps, self-rating out of 5. After four weeks you’ll have genuine data on what’s improving and what isn’t.
Use Your Phone to Improve Faster: Video Analysis for Home Training
This is possibly the most underused tool in home cricket training without a coach, and it costs nothing. Your smartphone’s camera is a legitimate coaching assistant if you use it properly.
How to Film Yourself
For batting:
Side-on angle (90° to your stance): Shows head position, front foot movement, bat path, follow-through. This is the most useful angle.
45° angle from behind off-side: Shows your backlift line and whether you’re hitting against a straight front leg.
For bowling:
Behind the bowler: Shows run-up rhythm, alignment, release point.
Side-on at the crease: Shows your gather, jump, front arm pull-through, and follow-through.
Put your phone on a tripod (₹400–₹800 on Amazon), or prop it against a bag. Film the session, then review two or three deliveries or shots in detail at the end. Don’t watch the whole thing — pick the worst one and the best one, and compare them.
Apps to Use (Free)
iPhone built-in camera slow-motion: Shoot at 240fps in strong light. Outstanding for analysing contact point and wrist position.
CapCut (free): Import your clip, slow it down to 0.1x, add a frame-by-frame scrub. Clear enough for serious technique analysis.
Technique App / Coach’s Eye: Paid but inexpensive. Lets you draw lines over your footage to check bat angle, head position, and stride length against a reference.
What to Look for in Your Footage
That comparison alone is more motivating than any coach’s pep talk. When you review your batting:
– Is your head still at the point of contact, or is it moving away?
– Is your front elbow high and driving through on drives?
– Are you hitting the ball in front of your body, or letting it come too far through?
When you review your bowling:
– Is your seam upright at the point of release?
– Is your front arm pulling down (not sideways) through the action?
– Is your landing foot pointing toward the target?
Compare clips from Week 1 and Week 8 side by side. this is an essential part of home cricket training because you don’t have coach or mentor watching your game.
Safety and Injury Prevention for Unsupervised Home Training
Home cricket Training without supervision is where most overuse injuries begin. You don’t have a coach watching your workload, no one to tell you your action is drifting into a danger position, and no structure to stop you from bowling 200 balls because you’re in the zone. our article on Why Fast Bowlers Keep Getting Injured in India? Best cricket shoes for fast bowlers in India perfectly align with this section.
Warm-Up Non-Negotiables
Before every session, regardless of length:
– Wrist circles: 10 forward, 10 backward
– Shoulder rotations: 10 each direction, both arms
– Hip circles and lateral lunges: 10 reps each side
– Ankle rotations: 10 each foot
– Light skip: 2–3 minutes
This takes less than eight minutes and significantly reduces the risk of the injuries that most often end home cricket training sessions: shoulder strain from bowling, wrist strain from batting, and ankle rolls from footwork drills.
Surface Warnings
In home cricket training you deal with different kinds of surfaces which might not be ideal ones of cricket. So guard against injuries is your responsibility. Bowling on concrete is a legitimate injury risk. The impact on your front foot during delivery is severe — equivalent to stopping a significant force in a single step. Do this repeatedly on hard concrete and you’ll accumulate impact damage to your ankle joint, knee, and shin. Use a rubber mat, a yoga mat, or an artificial pitch mat. It’s not optional if you’re bowling regularly at home.
Batting footwork drills on smooth tiles are also risky. Lateral movement in cricket spikes or rubber-soled shoes on polished floors is a recipe for a rolled ankle. Train in cricket shoes, or add non-slip mat sections to your surface. The tag line is “respect the surface” while home cricket training.
The Five Most Common Home Cricket Training Mistakes
1. Skipping warm-up because “it’s just a short session.” A 20-minute session can still give you a shoulder injury if you bowl your first ball cold.
2. Over-bowling in a single session. Without a coach counting your balls, it’s easy to bowl 150 in a session when your body is ready for 60. Set a ball limit before you start and stick to it.
3. Repeating the same drill without feedback. Drilling a technical flaw 200 times makes it more automatic, not less. Use your phone camera weekly to check you’re grooving the right movement, not reinforcing a mistake.
4. Training through sharp or localised pain. Muscle soreness is fine — that’s adaptation. Sharp, localised pain in a joint or tendon is a signal, not a challenge. Stop, rest, and if it persists, see a physiotherapist.
5. Neglecting your non-dominant side. Cricketers almost always train their dominant hand and ignore the other. But catching with your non-dominant hand, throwing with it occasionally, and training ambidextrous footwork creates a more complete fielder and a more balanced athlete.
Checkout if you want more insights on strength training, resistance band workouts, athletic conditioning.
Frequently Asked Questions About Home Cricket Training Setup
Can I practise cricket alone at home?
Absolutely — and in some ways it’s more effective than group sessions for fixing technical problems. Solo cricket drills like shadow batting, target bowling, wall catching, and the hanging ball drill are all designed for one person. Most elite players do significant solo training as part of their weekly routine.
What is the minimum space needed for cricket practice at home?
A 6×4 ft space is enough for shadow batting, grip work, fitness drills, and seam position practice. If you have 10×8 ft or more, you can add wall catching and the hanging ball drill. A full net setup needs around 15×5 metres, but that’s optional — plenty of meaningful work happens in much smaller spaces.
How can I practise bowling at home without a net?
Set up a target zone on a mat or hard surface using chalk or tape. Bowl at it. That’s it. If space is very limited, work on your run-up groove and your seam position without releasing — the mechanics work is more valuable than the ball reaching a target anyway. A hanging ball or rebound mat adds more options if you want them.
What cricket equipment for home practice should I buy first?
If budget is tight: a rubber stump set, a soft training ball, and a skipping rope. That covers technique, target bowling, and fitness at minimal cost. The next upgrade worth making is a hanging ball trainer — it’s one of the most effective home batting tools available at any price point.
How many hours a day should I practise cricket at home?
Quality beats quantity. Thirty minutes of focused, intentional practice — one drill at a time, with full attention — is worth more than ninety distracted minutes. Build to 45–60 minutes once your routine is established. More than 90 minutes of skills work in a single day shows diminishing returns for most amateur and club cricketers.
Can I improve my batting without a bowling machine?
Yes. The hanging ball drill, shadow batting in a mirror, and wall-drive repetitions are all highly effective at improving timing, technique, and contact point — without a single ball being bowled at you. A bowling machine helps. It’s not essential.
A Final Word: Consistency Beats Every Shortcut
The best home cricket training setup is not the most expensive one. It’s the one you actually use, three or four times a week, every week, for months. A ₹500 rubber stump set and a chalk line used daily will improve your game more than a ₹30,000 bowling machine used twice a month.
Start with what you have. Use your space. Film yourself. Track your progress. And treat each home session not as a replacement for match play or net practice, but as the daily investment that makes those sessions count.
The players who show up to nets with their technique already sharpened, their fitness already built, and their drills already dialled in — those are the ones coaches notice. That player is built at home, in the gaps, in the sessions nobody sees.
Set up your space this week. Even if it’s just a corner of your terrace and a hanging ball. Start there.
🏏 Think your reflexes are fast enough for professional cricket? Take our Cricket Reaction Time Challenge and discover whether you rank as an Elite Batter, Club Cricketer, or Weekend Player.


Pingback: Fast Bowling Master Guide: Beginner to Pro